
Fieldcraft · PINPOINT & RECOVER 42
How to pinpoint and recover a metal detector target
Pinpoint a metal detector target accurately, cut a smaller plug and use a handheld probe to recover it with less disturbance on UK permissions.
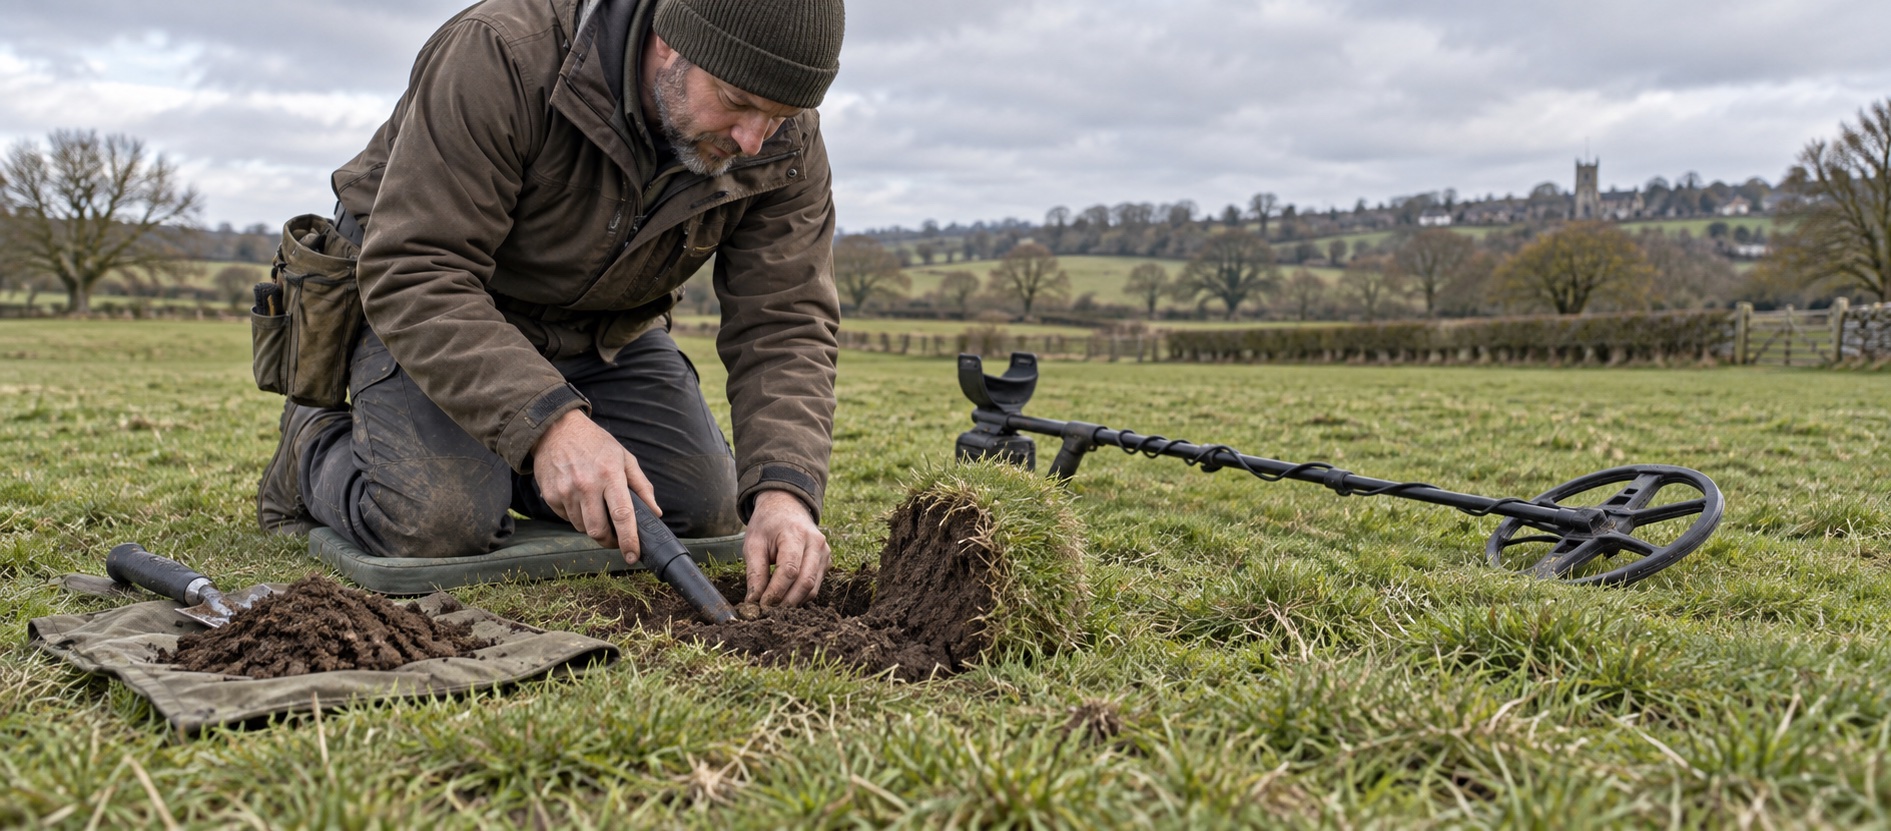
Pinpointing is an estimate; target angle, depth and nearby metal can move the apparent centre.
The landowner's agreed recovery method and ground condition decide whether a plug is appropriate.
Recheck the hole, plug and spoil, then reinstate the surface before moving on.
Start in normal search mode
Do not press pinpoint as soon as a tone appears. First sweep the target with the normal motion mode and decide whether the response is repeatable. Shorten the sweep, approach from two directions and listen for a consistent centre. A broad smeared response may be a large shallow object rather than a coin.
Lift the coil several centimetres and sweep again. If the target remains loud across a wide area, expect a can, sheet metal or multiple objects. This size check reduces unnecessary turf cuts and helps choose a safe recovery point.
Use the cross-sweep method
Pass the centre line of the coil over the response from left to right, then mark where the strongest point occurs. Turn roughly 90 degrees and repeat. The intersection gives a useful first estimate.
With a Double-D coil, the strongest search strip usually runs along the centre spine. Wiggle the coil in short movements over the target and pull it slowly backwards; the response often drops as the target passes the front centre edge. Coil design varies, so test this method over visible objects with your own machine.
Use the detector's pinpoint mode
Move the coil away from the target, activate pinpoint mode as the manual instructs, then sweep slowly across the estimated centre. Many detectors use a non-motion audio response that becomes stronger as the coil centres over the object. Some displays also narrow the position or show depth.
Avoid activating pinpoint directly above the target because the detector may detune around it and produce a small or offset response. If the audio seems broad, release the control, move away and start again. Retuning closer to the target can narrow the response, but over-retuning may hide it.
Depth readings are estimates
Most detector depth indicators assume a coin-sized target in a typical orientation. A large deep object can appear shallower; a small or edge-on object can appear deeper. Mineralised ground, coil choice and sweep height also change the estimate.
Use depth to plan the recovery, not as a promise. If the signal continues below the depth agreed with the landowner, stop rather than expanding an unauthorised excavation.
Mark the centre without stabbing the target
Place a plastic marker or your boot toe beside the estimated centre. Do not drive a screwdriver or probe into the strongest point; that is where a coin or fragile object is most likely to be. Plan the first cut outside the target response.
On dry sand, a scoop can remove material without a turf plug. On pasture, the surface and permission may allow a hinged plug. Parks, sports turf, pasture, ploughsoil and foreshore each need different recovery methods.
Cut the smallest recoverable plug
Only cut turf when permission and conditions allow. Use a clean curved or horseshoe cut that leaves one side attached where practical, keeping roots connected. Lift the turf gently and place loose soil on a cloth or kneeling pad.
Do not make a tiny plug that tears apart. A slightly wider controlled hinge can reinstate better than a narrow cone. Avoid recovery in saturated, frozen or drought-stressed turf because the surface may not heal cleanly.
Retune the handheld pinpointer
Switch the pinpointer on away from the detector coil and metal tools. If it chatters in mineralised soil or salt, retune it close to the ground according to the manual. Start on a stable sensitivity rather than maximum range.
Scan the surface of the plug, the hole walls and the removed soil in a fixed sequence. Audio or vibration that intensifies toward the target is more useful than random movement. Keep the probe parallel to a wall when checking it, then rotate to narrow the strongest point.
The Garrett PRO-Pointer AT provides proportional audio and vibration, three sensitivity levels and a fast retune function. Its 360-degree detection area is useful in a hole, but the tip and sides still need a methodical scan.
Keep the main detector and pinpointer apart
An active pinpointer can interfere with the main detector, and a nearby coil can affect the probe. Place the detector far enough away that the pinpointer remains stable. Do not rest a spade, phone or finds pouch against the hole while testing.
If the pinpointer sounds everywhere, reduce sensitivity or retune. If it remains silent, recheck the target with the main coil before digging deeper. The object may be in the plug, on the spoil cloth or displaced to one side.
Recover from the side
Once the pinpointer identifies a small area, loosen soil beside the response with fingers or a suitable non-scratching tool. Do not pry directly against a coin edge. Lift the object with supporting soil when it appears fragile, wet or corroded.
Photograph an unusual object before rubbing off soil. If several objects appear together, a container or compact layer is visible, or the signal extends below the permitted depth, stop and follow the record-a-find process.
Solve common pinpointing errors
The target seems to move
Check for two nearby objects, a nail producing an elongated response or loose metal in the spoil. Return to normal search mode and sweep each direction with a shorter arc.
The pinpointer sounds around the whole hole
Retune against the soil and lower sensitivity. Highly mineralised or salty ground can reduce useful range. Make sure the probe is not responding to the spade, detector coil or a metal kneeling aid.
The target disappears
Scan the plug, cloth and boots, then pass handfuls of loose soil below the stationary coil or beside the pinpointer. A small object may stick to muddy gloves or sit edge-on in a plug.
The centre is beside the detector mark
Deep targets, sloping ground, target angle and coil geometry can offset the apparent centre. Crossing from two directions and checking hole walls is more reliable than trusting one pass.
Recheck and reinstate
Sweep the recovered object away from the hole to confirm it caused the signal. Then recheck the hole and plug for a second target without automatically widening the recovery. Multiple objects close together can be archaeologically important.
Return loose soil, close the turf hinge, press the plug level and lift flattened grass. Remove sharp modern debris. From standing height, the recovery should not create a trip edge, hollow or visible scatter.
Good pinpointing is measured by the ground left behind, not by how quickly the object reaches the pouch.
Common questions
Frequently asked questions
Why is a target not under the centre of the coil?
Target depth, angle, nearby metal, sloping ground and coil geometry can offset the apparent centre. Cross the response from two directions before breaking the surface.
Do I need a handheld pinpointer?
No, but it can reduce recovery time and unnecessary widening once the target area is already narrowed. The detector coil still performs the initial location.
Why does my pinpointer sound around the whole hole?
Mineralised soil, salt, high sensitivity or nearby metal may be causing it. Retune against the ground, reduce sensitivity and move the detector and spade farther away.
Should every grass target use a turf plug?
No. Permission, soil moisture, turf condition and site rules decide the recovery method. Avoid cutting turf that cannot be reinstated cleanly.
Helpful products
Three pinpointers for controlled recovery
A handheld probe helps after the target area is already narrowed. Compare waterproofing, retune controls, audio and holster retention rather than expecting the longest air-test range.

Premium pinpointer
Garrett PRO-Pointer AT
Best for: Regular inland, beach and shallow-water detecting where simple controls and a robust waterproof body matter.
- 11.5 kHz
- Whole pinpointer to 6 m (IP68)
- 200 g with battery
A highly visible waterproof probe with three sensitivity levels, proportional audio and vibration, fast retune and a 360-degree detection area.
Know before buying: One button handles power, retune, sensitivity and silent mode, so the control sequence takes a little practice. It uses a replaceable 9V battery.

Premium pinpointer
Minelab PRO-FIND 35
Best for: Detectorists who want adjustable sensitivity and an extra ferrous clue, especially around iron or when using a non-discriminating detector.
- VLF with DIF interference reduction
- Whole pinpointer to 3 m
- 188 g without battery
Five sensitivity levels, audio and vibration, a lost alarm and a separate ferrous response add useful control around awkward or iron-contaminated recoveries.
Know before buying: Ferrous tone ID is supporting evidence rather than certainty. At 3 m it is waterproof, but not rated as deeply as the Garrett.

Mid-range pinpointer
Nokta Pointer
Best for: Field users who value replaceable wear covers and separate audio, vibration or combined alerts.
- 18.2 kHz
- IP67 waterproof
- 235 g with battery and cover
This adjustable waterproof probe includes two replaceable hard-shell tip covers, three alert choices, an LED and automatic lost-alarm and shut-off features.
Know before buying: The current manufacturer specification lists 18.2 kHz, while some retailer copy shows an older figure. It is IP67 rather than deep-water rated.